 FIELD MODULE – BA Fine Art – Exhibition
(Please also see Subject Module tab for further Documentation, Context and Ideas)
*****
Augmented Art and Business Cards
Some of my drawings and business cards in this exhibition are treated with Augmented Reality. If you want find out how to activated then with your smart device then follow the link below for full instructions.
Click Here: Instructions for Augmentations
Look out for the following images that are augmented in this Exhibition


******
WHAT IS IT ALL ABOUT? – THE KEY CONCEPTS
Carrying on from my research in the first half of the year, research for my dissertation, and from a suggestion given by one of my lecturers during my Formative Assessment Feedback session in December to look into alternative models of animation such as Zoetropes and Plenikoscopes. I feel as if everything finally clicked into place.
What did I want my work to address?
- Climate Change
- Over Dependance on Technology
- Alienation within modern Society
- Inequality
- Shared responsibility to the welfare of all by all
- My Own Self Learning
A lot of my work is in response to what I and many others perceive to be wrong with humanity. The media is full of damning reports on war, hunger, disease, crime and warnings of imminent planetary destruction. All this seems to feed directly into my subconscious. I have noticed that my dreams which have always been quite lucid sometimes seem to reflect periods of longer exposure to negative media. I have also have an interested in examining possible dystopian or apocalyptical futures. This is highly representative in my drawings as they can include unusual creatures, unusual landscapes and happenings that are sometimes a direct or indirect interpretation from my dreams.
I wanted my final pieces to represent me and my current standing point as an artist.
Final Concepts for Exhibition
– Zoetrope
– 3 Digital Animations
– Augmented Framed Original Drawings
– Augmented Reality Business Cards (Free art that can be removed from the gallery)
The Zoetrope in Action:
Close up of the animation within the Zoetrope
Animations for the Augmented Reality Drawings and Cards:
From Start to Finish – THE PROCESS
(Research – Dreams – Drawings – Animations – Augmented Reality – Zoetrope)
– Drawings and Animations: This project started with drawings loosely translated from lucid dreams that I have from time to time. These dreams seemed to come more regularly and are more vivid after periods of research into current world events and issues. I found some of them to be quite disturbing. I wanted to try to capture the essence of these dreams in the drawings however I felt they were too flat. I decided to use animation and sound to try to recreate the dreams and their looping nature. I hope to give the viewer a private glimpse into my possible prophetic and often twisted nightmares. Although I don’t recall sounds in these dreams I tried to capture what I felt it should sound like. I have used altered real life sounds layered in with synthetic ones with a hope to emphasise the tension between the machine and the organic.
– Augmented Reality: Some of my original drawings and business cards are treated with Augmented Reality for three reasons:
1 – To further emphasise humanities increasing relationship with new technology
2 – To create small pieces of art that are free to take away (subject to availibility)
3 – To create something that could be fun and enjoyable and might possibly provoke wonder. As children we learn through play and I believe that this shouldn’t change as we grow into adulthood. I find as an artist I am at my most creative when playing and having fun.
– The Zoetrope – One Good Turn Deserves Another: Due to the heavy nature of my animations and drawings I wanted to create a piece to counteract the negativity of the previous dystopian imagery. I wanted it to somehow be a resolution to the question I feel my previous work was asking.
“How can We/I prevent these possible post-apocalyptic scenarios from happening? How can We/I heal the brutal wounds we have impacted among ourselves and onto the planet?”
I am not so arrogant to think that I have all the answers (even a few) to the complex troubles of our planet. But I do feel it is my duty as a member of humanity to never stop trying no matter how little my contribution seems in the grand scheme of things.
I had several ideas before I settled on the Zoetrope. I felt it was apt as its very name means “Wheel of Life”. I created it as a multilayered work that I hope converses the following: The Earth, Equality, Symbiosis and Diversity, Low-Tech Possibilities. It was also for me personally a learning process as I had never created anything like this before and involved a lot of learning new processes. (I was more than a little afraid that it wouldn’t work, but I took a leap of faith in myself)
Fundamentally however; in a world that is increasingly encouraging alienation and the lessening physical contact and communication between people due to advancing technologies I wanted to create a piece that forced people to interact for a greater good. In order to view the zoetrope as intended a minimum of two people are required to work it. If you are on your own you would have to engage others to help and then help them in return to truly enjoy the piece. Therefore my key concepts overall is to promote human interaction through play whilst also opening a dialogue on the issues that surround our beautiful planet.
“One Good Turn Deserves Another” …..our planet has being giving us mostly good turns as long as human and animal existence, it is about time we returned the favour.
********************************
Flash Crit – 26th February
I was surprisingly nervous about my Flash Crit and I am not really sure why. I think I was concerned that the context of my work would not be clear. Everyone was tired as I was the last person to give my presentation. Two other lectures joined the presentations so there was a good number in attendance.
Presented:
– My small working model for the larger Zoetrope
– Images of the animation to be used in the Zoetrope
– The fishes animation
– The sketch for the second animation
– The sketchbook containing some of the sketches
I felt that I got really positive feedback from the lecturers. I also got some great advice from them. They suggested that I remove the head from the animation and I agree with this. They also said that they would like to see the original tiny sketches presented at the exhibition in some form.
I was worried that the viewers would not be impressed by how short the loop of animation was and not understand how much time had actually gone into it. I was also concerned about the jumpiness of the animation however the lectures said that this added to the experience of viewing it. I was really glad that they did understand how difficult the process of animation is. I felt tired but strangely refreshed and enthusiastic after the session. I feel that my work is on the right path. The Flash Crits are a fantastic way see if your concepts are clear and get genuine audience feedback. I feel is has really helped me to see my work more objectively.
Learning Process is an Integral Part of my Art
One of the things I love about being an artist is learning new things and developing new skills. To me the learning process is of equal importance to the finished piece for me as an artist and for participants where relevant. With nearly every piece I create I try to incorporate some form of further development of skills and learning. Being technically inept or lacking the ability to see my creations come to life frustrates me deeply as is it is fundamentally important for me to have created the whole piece as much as possible by my own hands. I have learned a lot about animation in particular using animation software through my work this year and I look forward to learning through the difficult process of building my final pieces and installing in the exhibition.
Building the Machine
At first I wanted to build a machine using parts from old bikes. I wanted the machine to be hand driven by a lever that would rotate two wheels, the front wheel would carry transparent animation frames mounted in front of a strong light to create a projection the power for the lies would be generated from the back wheel via a bicycle dynamo. I wanted to encase the back wheel with the lever behind a wall so that only the lever is visible. The person who turns the lever activates the animation, however they cannot view the animation because the wall obscures their vision. the activator is then forced into a situation of engaging with another person to help him to view the installation in its totality. The activation most activities the animation for a viewer and then take turns the viewer then becomes the activator to activate the animation for the other person. I had hoped that this encouragement of participation and interaction with both the work and other people would be a positive action against social alienation. I feel people in modern society are becoming increasingly more alienated from one another.


After a couple of attempts I realised that this machine was starting to become more high-tech than I would have liked. At first I had only intended to use the dynamo to power a small light that projected the animation. However this light would not be powerful enough and also I may have had to use other equipment such as a strobe light, inverter and battery in order to make sound and motion.
Trial and Error


I decided it was better to change my original design instead of investing too much into something that may or may not work. This brought me back to the idea of the zoetrope. I decided it was better to construct a large zoetrope that still incorporated the main focus of the piece, which is to encourage participation from viewers through the activation of the piece.
Concepts and designs of the zoetrope


After approaching the technical demonstrators in the workshops about my plan they asked me to create a miniature working model to give them a clear idea of what it was I wanted to make.

Making the model

The model worked really well except for the elastic band slipping. In the real one I will be using a bike chain.
I aslo marked out in chalk on the floor the exact size I had settled on for the original piece to give be an idea of scale. I would have liked it to be bigger but cost dictated.

Space measured out and chalked out on the floor
Choice of Materials
The choice of materials is vital to me. I want to use as much recycled parts as I can; like reclaimed bike chains and cogs. I have chosen birch ply rather than mdf as it will be easily taken apart and put together so the piece is reusable. I have also chosen to use steel for the frame as it will need strength to support the weight. I am going to you as much reclaimed stuff as I can so as to limit my carbon footprint.
Final Drawing for Zoetrope


Cutting Steel – My shoulders were sore for 3 days after this! I eventually moved on to the Rapper cutting machine which was much easier. However is broke down and I had to use a hacksaw instead.

Welding: A new skill – I really enjoyed welding and will be using it again for future projects. However the whole process took a lot longer than I thought it would. It is because everything needs to be measured corrrectly.


I found I had a lot of issues along the way but with a combination or pure will, defence and good advice from the fantastic Tech Dems I resolved them slowly and bit by bit.
I found I had to take somethings apart regularly to get them to work.


Plans changed regularly as upscaling brought more and more problems.


I was worried that the chain would be too slack and derail or be too tight and jam. This piece helps me to adjust the tention on the chain so I can have it just right. I also welded two bars across the middle cube to keep the chains slightly elevated and to act like guides. The combination or tention adjustment and guides works.

Finally I got it to turn the way I wanted it to… however, unfortunately due to gravity if you turn the handle too fast it will still try to derail. However if you turn it too fast you also can’t see the animation so this should put people off for doing so.
Creating the handle – I wanted it to represent my concept behind machine. After discussion with one of the Tech Dems I decided I would sand cast it in aluminium as this would give me the freedom to create a more fluid organic look that would compliment the animation and concept. The top piece represents the fluidity of water and the lower part of it is representative of the earth and life. Both of these combine to create a handle that rotates in a circle emulating life itself.


Getting it to the top floor
I built it so it could be taken apart for ease of transport. I also put wheels on it so that I could move it easily. However I was forced to bring it around the building instead of through it due to a blockage at the workshop door. It wasn’t designed for rough terrain and by the time we got it around the front of the building the wheels on the front had broke. Eventually we got it I the elevators. I took the back section off and it fit easily in the elevator as planed. At the top I was thankful of help from two lecturers in putting it together again. I put new wheels on it the following day. I also built the screen once I got it upstairs.


Sanded the Screen

Put straps on the machine to avoid the screen being knocked over.

I made the slots smaller and the images bigger as sujested by the print lecturer. Worked a treat 🙂

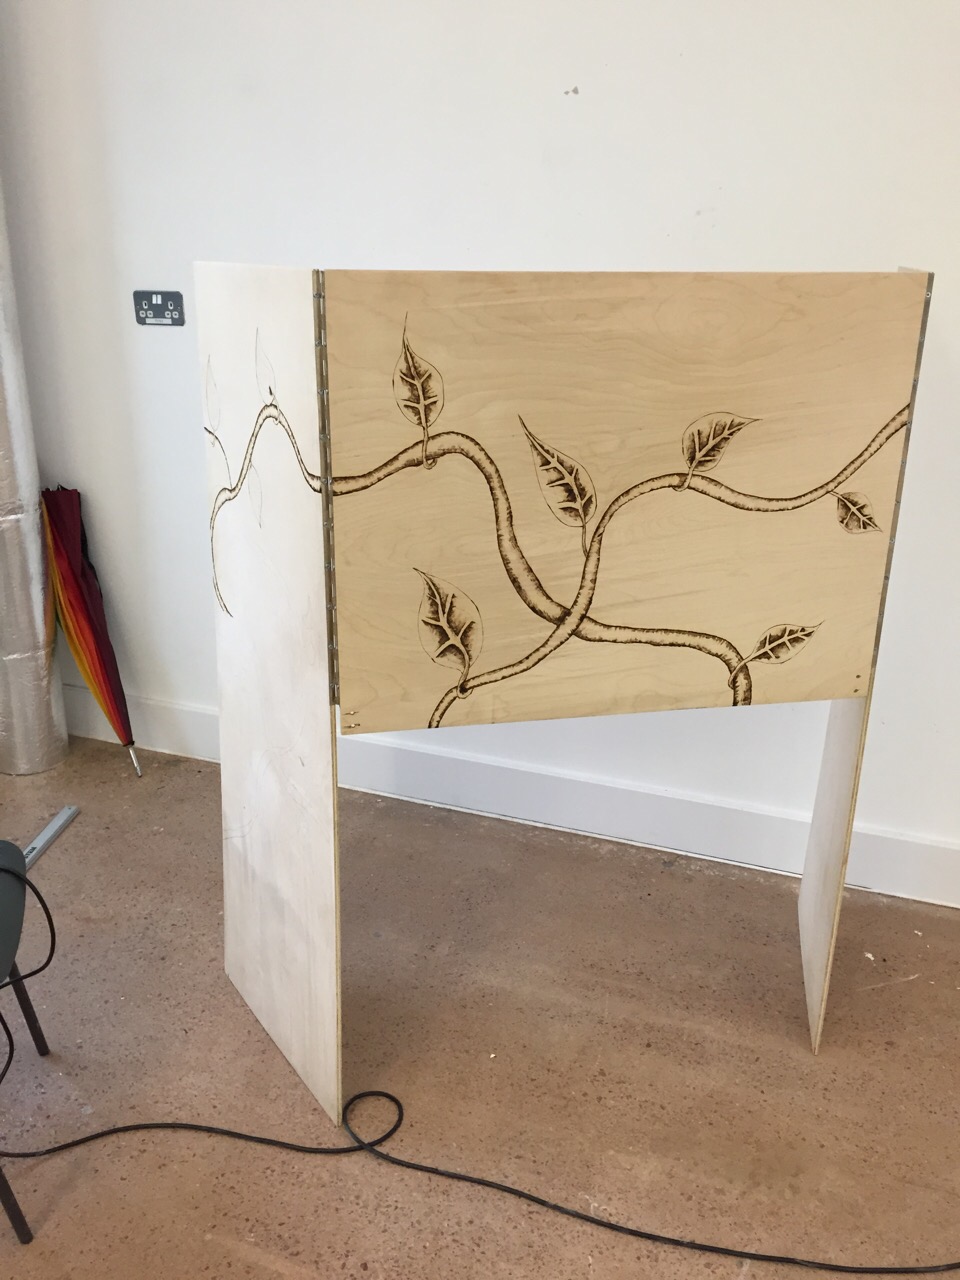
Considering burning into the wood with organic forms then oiling it for a beautiful finish. (Time permitting)


After a bit of practice I decided that the burning was a good idea.

Almost finished


I finally get my space for the Exhibition – A lot of work to be done.

Helping hands – We were allocated first year students to be helpers. This is a fantastic idea and a great help for us. I remember helping out in my second year and I found the experience very valuable and rewarding. I recieved two wonderful ladies. I have to give them a huge thank you for all their help, I simply couldn’t have gotten it all done on time without all their hard work. Becky and Farah, you guys are awesome and I hope when you get to third year you’ll get just as much help as you gave me. Thank you ladies.
Now I’m in my space I have more room to finish the zoetrope, but I have to be patient as I have to wait till everyone is finished sanding their walls because the black panels for the drum part attract dust badly. So instead I got to work helping with the up then preparing my walls and floor. I still have to build my animation space.
I had the images for inside the machine professionally printed as I wanted the best possible results. It was finally time to build the drum and put it all together.


When I had finally finished preparing the drum I rallied about ten artist colleagues to help me attach it to the wooden disk. This part was surprisingly less fiddly than the first time I did it thanks to the help I got.


TA DAAA! Animates wonderfully.
I then had a few more things to do to finish the zoetrope completely. Finishing touches if you like. I had to build a box that had hidden screws (Screws to make it removable) to cover the bolts on the top. I have to admit, I love the finish on this part, it sanded beautifully and blends in perfectly.


I sanded and oiled all the wood till it was gleaming. The Zoetrope was finally finished.
Work on the Exhibition Space
Building the animation space took longer than I though it would. Thanks to the help of Matt the new Woodwork Tech Dem we got the stud wall up. I then cut out the head shaped windows and the doorway. I also had to cover the top with blackout fabric and around the edges of the floor with white gummed wood to stop light coming in underneath. The top of the stud was was very uneven. My lecturer suggested that I cover it rather than try to cut it and that is what I did. When it was all filled, sanded and painted it looked great.


I did have some issues with the door as the chipboard was so bad the piano hinge kept falling off. I eventually fixed it by screwing and glueing support pieces behind both the wall and the door. A couple of new hinges and it worked perfectly.
Once I placed the equipment inside and got the sound working properly after a couple of technical issues I felt a lot happier with my progress. I had previously salvaged an old point out of the bin and cut it in half. I fixed a new top and bottom to the now seats and filled, sanded and painted them. I felt they looked a bit out of place so I asked another lecturer about her opinion. She said the same and suggested that I buy chairs. I had previously visited charity shops to find recycled stools as I couldn’t afford to buy new ones. I also did’nt feel buying stools for this exhibition was a waste of natural resources some how. I decided to try an alternative solution, I made a couple of handmade canvas cushions and I feel the result was better that I had hoped for. The cushions seem to tie my whole space together in an organic manner.


A couple more finishing touches and I was ready. I mounted and hung my drawings in large white frames that I hoped drew the viewer in. I made small white pegs to hang the headphones and needed something to put my business cards in. I had previously made a box from scrap wood for my business cards but felt it was too big and bulky and took away from the space. I again asked advice from another lecture who agreed. I had spent a bit of time on the box and felt a bit sad about not including it but the whole space would have been affected by it so it had to go.
I then when to try and buy a business card holder from a couple of different places. None had any, they were either sold out or had none. I was worried because my business cards were equally a part of the exhibition and really felt they needed to be there.

On my way in on submission day I had a little Eureka moment. I came up with a rather simple way of displaying my cards that would be subtle and unobtrusive.

I cut a small off cut of wood on the bandsaw then got my helper to sand it and paint it white. Fixed to the wall with screws and glue, filled, lightly sanded and repainted I feel it fits in perfect with the space.
Finished Exhibition Space – Ready for Assessment and Participants


The Animation for the Zoetrope
I had also spent a lot of time considering the animation that is to be placed inside the zoetrope. After much deliberation and trial and error I settled on an animation piece that spoke of another concept behind this work and that’s the concept of world preservation through acknowledgement of shared responsibility, active participation and equality.
I knew from my research on the zoetrope that the animation had to be simple with minimum frames. I eventually came up with the image below that describes the Earth, the natural world and humanity. When animated it is hoped that the viewers will be able to see the female sharing water with the male and the male in return sharing the plant with the female. This process should run in a continuous loop demonstrating the circle of life.
Digital images for animation zoetrope

Experimenting with different background colours

I digitally created these images in Photoshop and will be animating them using the software After Effects, then export each frame as an the image files. They will then need to be printed at possibly A2 or A1 size to fit inside the meter and a half wide zoetrope drum. This whole process involves a lot work, as the animation requires many layers. Although there is an orange background in these images I predict that the final images will simply be presented are on a white background.
Digital Animation 1 – Toxic Fish (Possibly influenced by the Fukushima Nuclear disaster)

Toxic Fish
The animation of the sketches is a surprisingly long and frustrating process. I am sure there must be quicker ways of doing this but I am not expert in the software and am learning as I go. Getting the fish to turn was a really difficult process…but got there in the end. I also spent a long time making the jaw, hair, neck and head move but in the end I am not going to use it. In my Flash Crit it was suggested that I remove the head as it did not seem to work with the rest of the animation. I felt although I had spent a lot of time on the head they were ultimately right. It is important not to be so precious about your work as to remove your objectivity.

This is a screen grab of a small section of the hair from the animation. As you can see there are a lot of adjustments to this layer.
Example of the audio process in Garage Band for Toxic Fish:

Digital Animation 2 – You Reap What You Sow

We Reap What We Sow

This animation was even more complicated than the first one as I had started to use the effects that were available within the software. The rendering time was ridiculous. There are also a lot more layers and layer manipulations. This caused the file size to increase exponentially. This affected my ability to preview the animation as I was making it. I spent a lot of time converting file types to make my looping DVD and the file type small enough for the augmentation software.

Creating the Audio Files for this Animation
I used Garage Band to write the audio for this animation. It was a lengthy process of trial and error. I eventually came up with a composition that I was happy with. It was complied using many layers of different sounds including real life sounds such as an oil can being struck. It also contains my own edited voice delivering messages to the viewers. Can you decipher the messages?
Example of the audio process in Garage Band for “You Reap What You Sow”

Possible method of presentation.
 I like the idea of the viewer becoming separated from the rest of the gallery while they watch the animations. I want them to feel as if they are on their own and immersed into it. Just like you would be if it were a real dream. I am also considering leaving them untitled as I would like the viewer to take their own interpretations from the animations. I may leave a book there for them to tell me their interpretations.
I had also considered presenting the animations as part of an installation. I had the idea to fill the space with lots of old CRT Television sets and old monitors that would display the animations, some of them flickering and some screens with just white noise. However finding enough old TVs and monitors was working becoming a bit of a nightmare. Also it didn’t quite fit with the concept of sharing my dream as a private experience.

Consideration for My Brochure Entry
In the brochure we are allowed 150 words and some images. I am considering entering in my Artist Statement as I feel is summarises what I am about as an artist at this moment in time. I am also contemplating entering the sketches that I am using for my animations as they are relevant to my current work and the Degree Show itself. I may even augment them so that the reader has an option to view the animations again and again after the show. I will have to create a proper webpage to explain the activation process and place a QR code for ease of access.
Artists of Interests and Research – Continuation from the Subject page
Eadweard Muybridge was born in Kingston upon Thames England’s in 1830. My bridge developed se motion sequence photography. Using a number of cameras Muybridge was able to capture motion in still images. He also created the Zoopraxiscope, this machine was used to animate still images recreating the original motion they were captured from. it could be said that Eadweard Muybridge was the father of cinematography.

Muybridge’s Zoopraxiscope

Example of a disk that could be used in a Zoopraxiscope

Muybridge – sequence of horse running

Muybridge – man walking up the stairs sequence
A lot of artists have been influenced by Muybridge’s work, one example is Marcel Duchamp’s 1912 “Man Descending Staircase.

Marcel Duchamp’s ” Man Descending Staircase” 1912
I have been using a lot of digital animation and augmentation in my work and I was becoming a little concerned about the amount of high-tech methods that I was using. I wanted some of my pieces to reflect this concern as I am also concerned about the apparent increased alienation between people in society due to lack of access to ever advancing technologies and resorces. I felt that creating something simpler and less high-tech like a Zoopraxiscope or Zoetrope that also somehow encouraged participant interaction with each other as well as with the work would resolve these concerns.
The Zoetrope was invented in 1834 by William Horner, who originally called it a Daedalum which means “wheel of the Devil”. It was later renamed to Zoetrope in 1867 by William F. Lincoln. The zoetrope means “wheel of life”.
Zoetrope – This was an advancement from the Phenaskiscope as more than one person could view it at any one time.

Praxinoscope – this one use a mirror instead of the slots to view. The mirrors supposedly give a clearer image
Phenakistoscope – this is mirror dependant and only one person can us it at a time


Zoetrope in Action
Tim Lewis who was born in England in 1961 creates many wonderful mechanical sculptures however I was first drawn to his Male Mechanical Zoetrope sculpture and then to other earlier ones such as “Ghost” and “Running Child”.

Male Mechanic 2008

Ghost 2007

Running Child 2006
Peter Hudson is as San Franciscan born artist. A lot of his work involves creating giant Zoetropes. I was amazed at the sheer scale of his work. In 2011 he presented “Charon” at the burning man festival. This piece was lit up at night, and using a strobe lighting it seemed to come alive.

Peter Hudson Charon 2011
John Edmark creates amazing 3D printed fibonacci (number sequences) zeotrope sculptures using the mathematics of nature and the golden ratio.
Matt Collishaw, Born in England in 1966.
Garden of Unearthly Delights
Throbbing Gristle
Parnographia
Guinness Book of Records – World Largest Zoetrope by Sony Bravia 2008
This overly spectacular piece to me seems to take from the whole idea of what my art about. Whilst some of these rather amazing pieces evoke awe I feel the spectacular would somehow distract and prevent clarity.
– Artist Jim Shaw was recommend to me by one of my lecturers as they felt my style of drawing reminded them of him. I have to say I can see why. I really do appreciate his work.

“Left Behind” 2010

“The Trilling Stories From The Book Of ‘O” 2011
Books and Journals
Suzi Gablik’s Reenchantment of Art, 1984 George Orwell, William Gibson’s Neuromancer 1984, Claire Bishiop’s Artificial Hells, François Matarasso’s Report Use or Ornament………..etc. My dissertation research has also heavily influenced my work.
Work Shops
– Setting up a Gallery Space and Working with Presentations


Fund Raising
The fund raising has begun. We have organised cake sales, Christmas craft stalls, nights out, raffles, a pup quiz and more.
For my part I have offered myself for commission work, made christmas decorations and badges. I am also in the process of making augmented reality Christmas cards using clay to make stop motion animation. It is taking a lot longer than I had hoped.
I have also been helping with ideas and Carys with her pitch that got us the stall in the city centre for our Christmas market.
I am also hoping to bake some apple tarts and other treats for the bake sale.
My Christmas Stall Creations


Salt Dough, Felt Craft, Beading with Shell and Origami Stars.
These took me about a week to make hard work but it was good fun. I had never made any of these things before so it was really interesting to see how they would turn out. The salt dough was surprisingly easy, even my teenage daughter was impressed and wants to make some more with me for our own Christmas Tree.
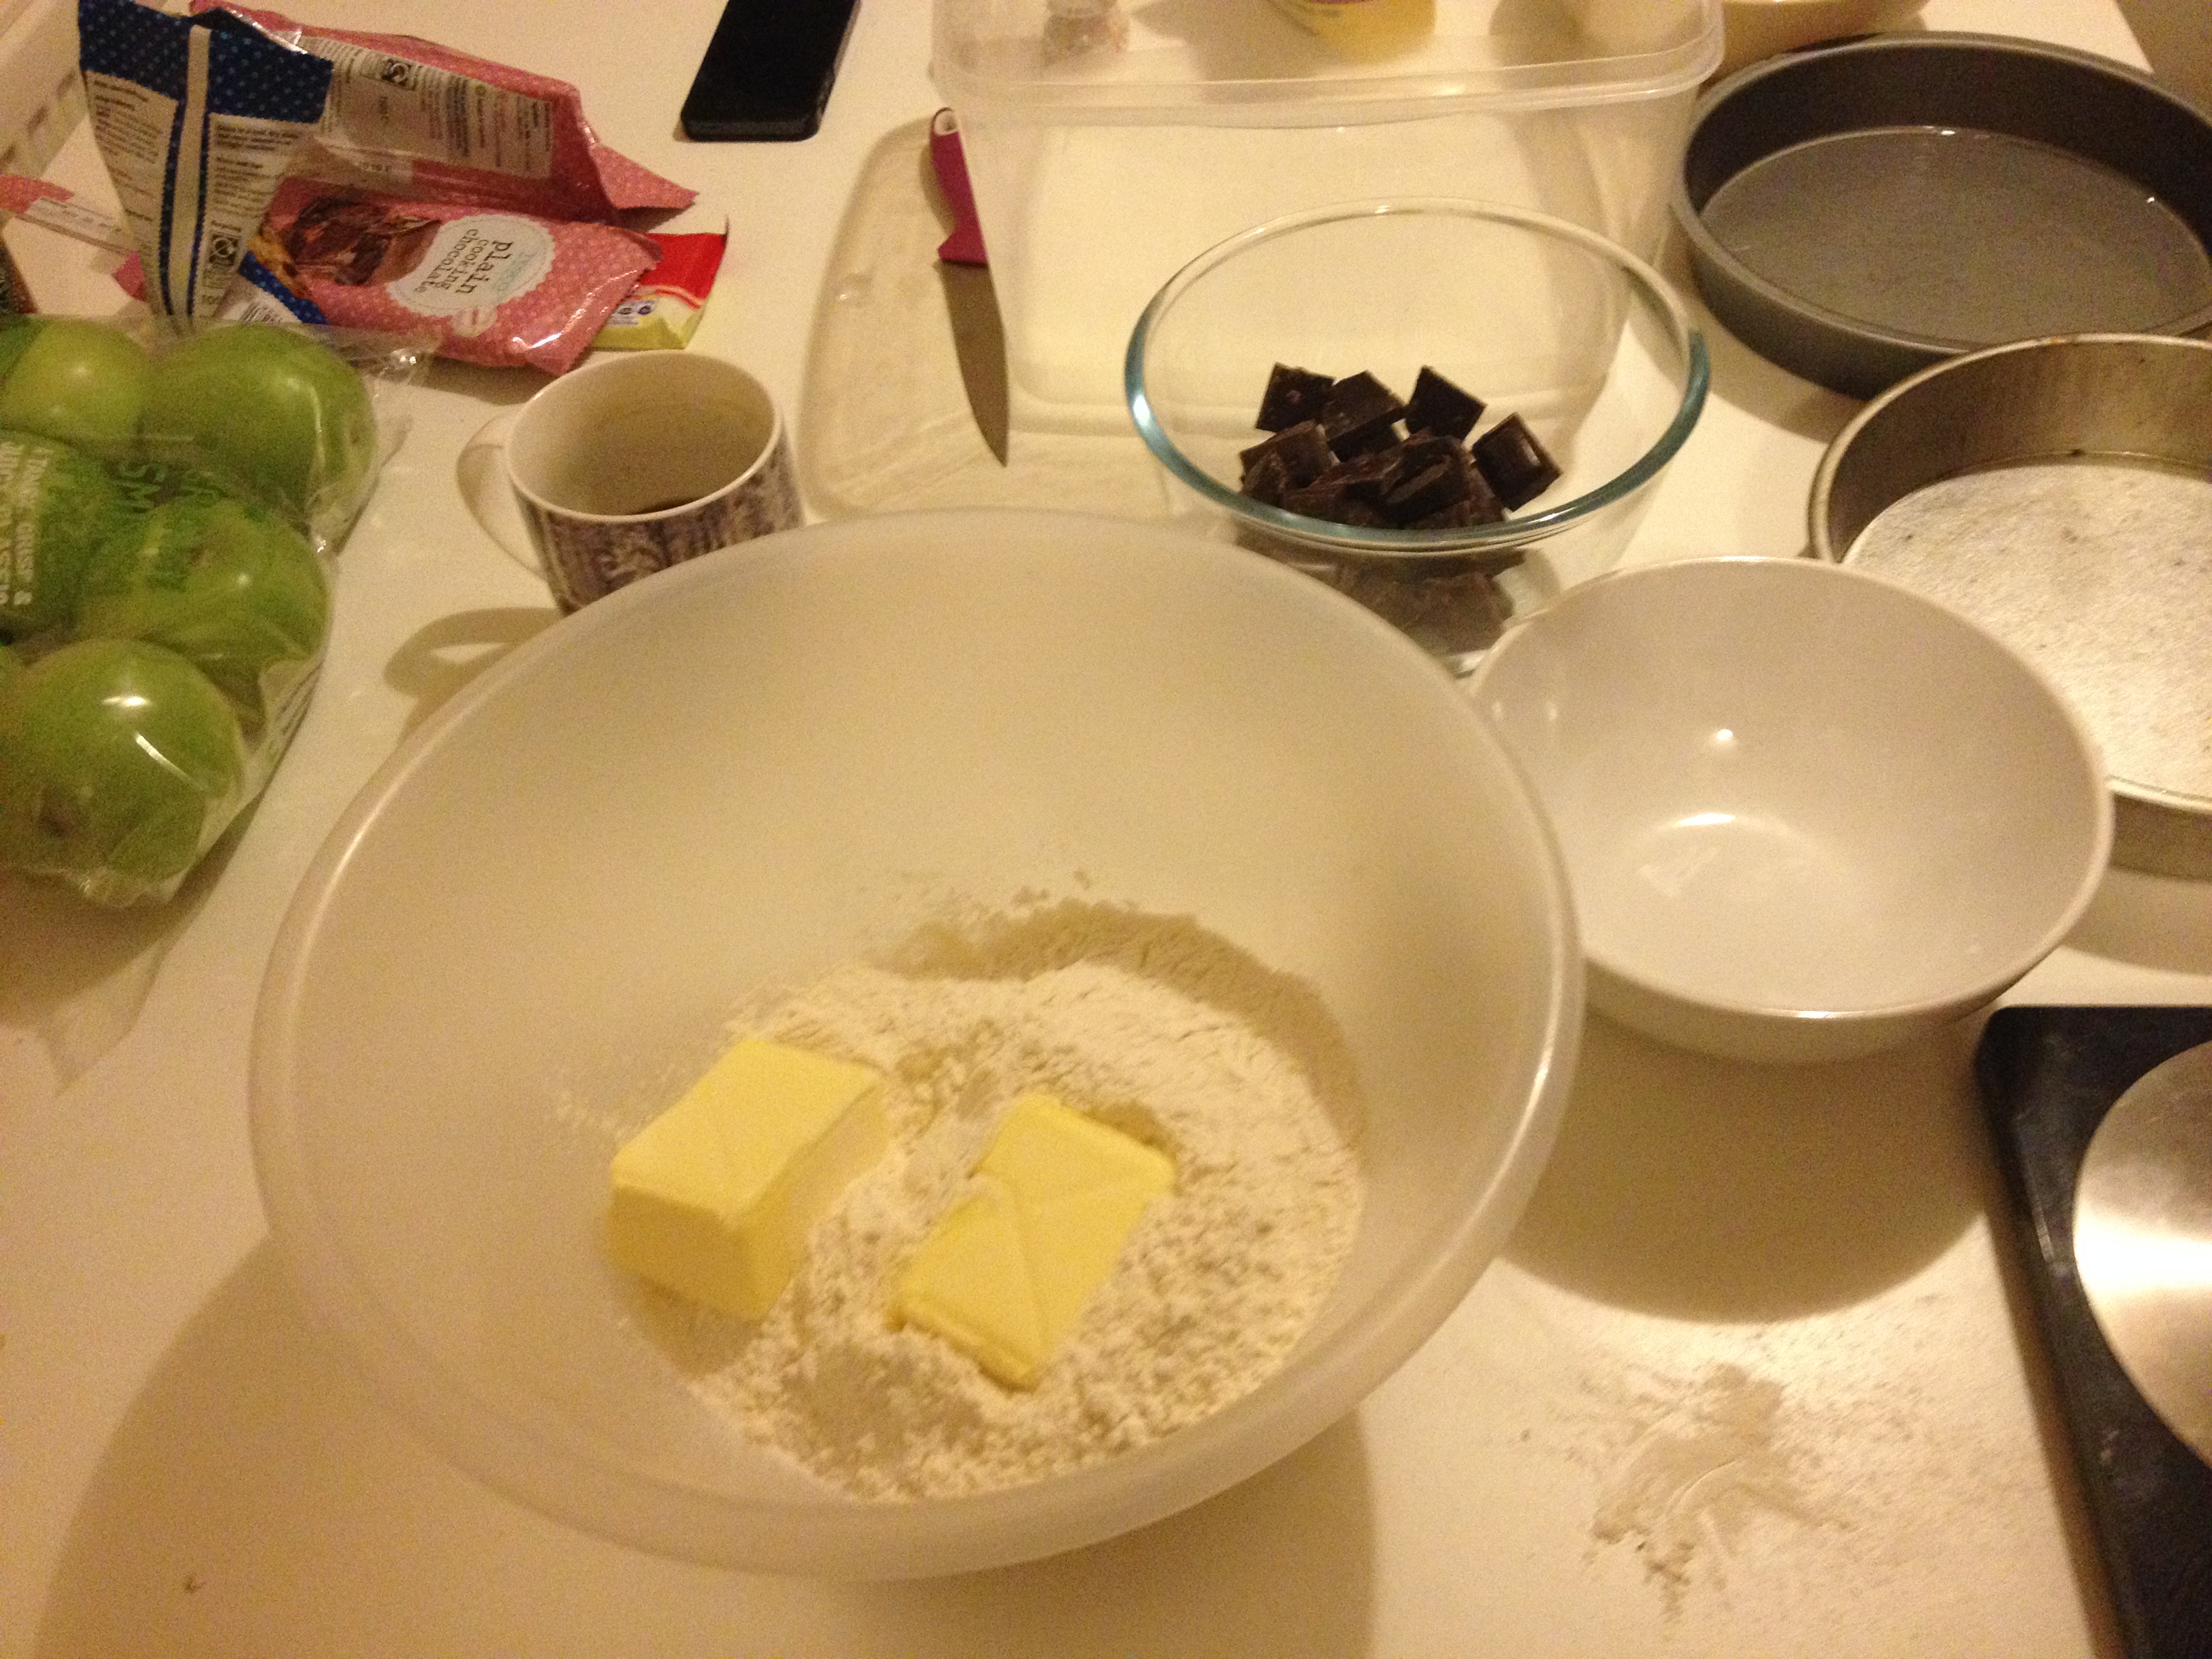
Recipe for Salt Dough
1 Cup of plain flour
1/2 Cup of Salt
1/2 Cup of Water ( you don’t need to use it all so add slowly until you get a good dry pliable consistency)
Bake in a low oven for 3 hours approx.
The original recipe I followed suggested I use the microwave to speed up drying time however I found this made the final creations lumpy.
Tip: I put formed wire loops in the dough before baking to allow for hanging.
Paint and use about 3 coats of clear gloss varnish.
Augmented Reality Christmas Card
It was lovely to try this out as I have only just been teaching myself Stop-Motion Animation and combining it with the augmented reality that I learned last year.
It takes a lot longer than I had thought. I snapped in total 150 photos for this and each one needs to be edited, paper folds hidden, Brightness enhanced, eyes lit up, cropped edges for close ups and thats even before I try to steam it all together and make the music. The set itself took me 3 hours to make.
This is a sample image from the video

Baking Baking Baking – For the Bake Sales – I hope people enjoy


Affordable Art Auction
I was happy to bid on a few pieces as the money was ultimately going back to help us all and I was happy to put one of my own pieces in too. I am now the proud owner of a unique James Green piece.


great awareness goin on there and hard work. also
..yes we aRE SO PROUD…….
Wow Deirdre! i wish i could document my influences and process as well as you. kudos!
if youre ever in san francisco, look me up. or just drop me a line at peter@hudzo.com peter hudson well done!!
Coming from you Peter that truly is a compliment seeing as you have been a key influence in my work. My degree show exhibition is on the 30th of May if you happen to be in the UK, it would be an honour. Or indeed if you are in the UK at anytime look me up, my sofa is your sofa.
[…] Deirdre Bennett is an interdisciplinary Artist. Much of her work is based on possible or impossible future dystopian environments. A lot of the images have been generated from Deirdre’s own dream sequences possibly influenced by her research into current world issues such as capitalism, climate change and war. Concerned with humanity’s self-destructive nature her practice incorporates animation, installation, painting and participation in an attempt to reach a diverse range of audience. https://deirdrebennettart.wordpress.com/field-module-ba-fine-art-exhibition/ […]
[…] BA Blog: https://deirdrebennettart.wordpress.com/3rd-year-subject-module/field-module-ba-fine-art-exhibition/ […]